
You might recognise PIR sensors from security alarms because their main function is to detect small changes in temperature (infrared) this happens when a something warm is in the sensors vision. They're recognisable because of the large white lense that covers the sensor and channels the sensors field of view.
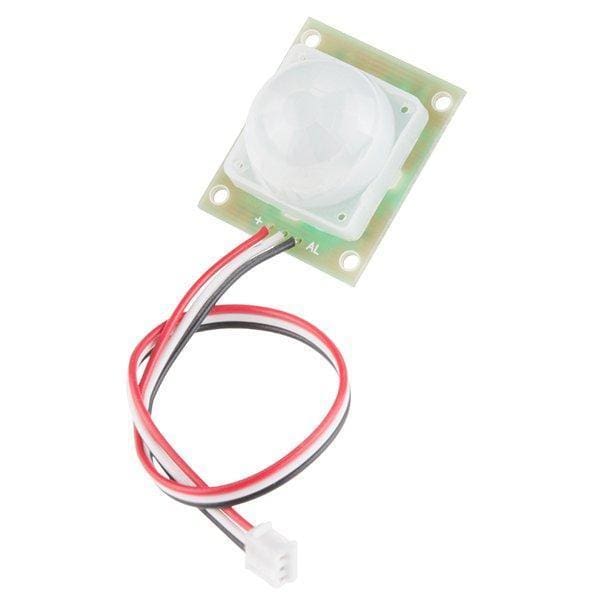
The sensors pinout is very simple, there's a power connection (Red), ground (White) and Alarm (Black/Yellow). It can be powered with anything from 5V to 12V, the datasheet says 12V but we've tested it with voltages down to 5V so it's ideal for most microcontrollers.
Connecting to a Microcontroller
The sensor has three wires terminaled in a JST PH connector, a lead can be connected to this or the connector simply snipped off and the flying wires used. The red wire is positive power (5V-12V), white is ground (0V) and the Black or Yellow wire is the output from the sensor.
The output signal from the sensor is an open-collector meaning a pull-up resistor is required. We're using an arduino uno which has this built into the inputs we just need to define it in our code.

Code
SparkFun created some perfect example code for the sensor which will show you how it operates and can be intergrated into a system/project. As the output of the sensor is an open collector you'll need to setup the input pin on the Arduino as an INPUT_PULLUP this will use the 200K resistor connector to the controller on the Arduino.
const int MOTION_PIN = 2; // Pin connected to motion detector
const int LED_PIN = 13; // LED pin - active-high

void setup()
{
  Serial.begin(9600);
  // The PIR sensor's output signal is an open-collector,
  // so a pull-up resistor is required:
  pinMode(MOTION_PIN, INPUT_PULLUP);
  pinMode(LED_PIN, OUTPUT);
}

void loop()
{
  int proximity = digitalRead(MOTION_PIN);
  if (proximity == LOW) // If the sensor's output goes low, motion is detected
  {
    digitalWrite(LED_PIN, HIGH);
    Serial.println("Motion detected!");
  }
  else
  {
    digitalWrite(LED_PIN, LOW);
  }
}
What does the code do?
The code defines the sensors input type as a pullup meaning that whenever something is sensed the signal will be pulled LOW and when nothing is detected the output will remain HIGH. The main loop contantly check the status of the sensors output and when it is low the code turns on the boards built-in LED and writes a message to the serial output. While the sensors output is not low the onboard LED is turned off an no message is outputted.