
We recently launched our LED Starter Kit which contains over 100 LEDs in a range of different types, colours and sizes. That's a lot of LEDs to use so we thought we'd make a short guide on each type and how they're typically used.

Included in the Kit:
- 10 x RGB Common Cathode LED
- 10 x WS2811 LEDs (NeoPixel compatible)
- 10 x Super Bright White LEDs
- 10 x 3mm Red LED
- 10 x 5mm Red LED
- 10 x 3mm Green LED
- 10 x 5mm Green LED
- 10 x 3mm Blue LED
- 10 x 5mm Blue LED
- 10 x 3mm Yellow LED
- 10 x 5mm Yellow LED
- 20 x Resistor (220R)
Standard LED (3mm/5mm)
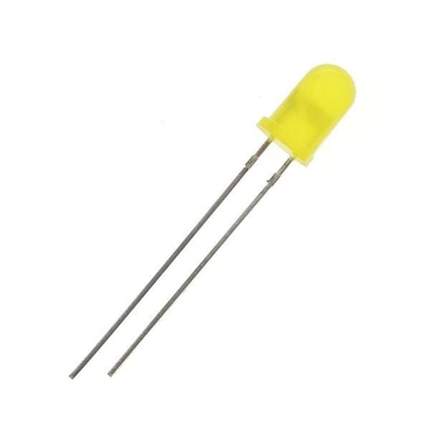
Each LED consists of an Anode (positive) and a Cathode (negative) connections and it's important to connect an LED up the correct way to ensure you don't damage it when current flows in the wrong direction. It's fairly easy to determine which side is positive and negative, the longer lead is the Anode (+) and the other leg is the Cathode (-).
This type of LED requires a current limiting resistor in order to prevent damage to the component making it unusable. We've included some 220 Ohm resistors in the kit which will limit the current to ~20mA when used with a 5V power source this is ideal for use with any of the 3mm or 5mm LEDs.
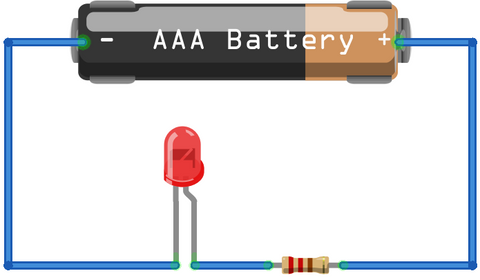
Simple LED Circuit
Below is an example of a simple LED circuit that would light up most standard LEDs. It's composed of an LED, current limiting resistor and a AA battery all connected in series.
RGB Common Cathode LED

This is an RGB Common Cathode LED, it's three individual LEDs (Red, Green, Blue) with a common ground in a single housing. You use it in the same way as a standard LED, apply a positive voltage to the Anode(+) and ground to the GND pin and it'll light up. This type of LED allows you to create a wide range of RGB colours by varying the intensity of the individual (R,G,B) LEDs. The easiest way to do this is to limit the current running through them, you can do this with a potentiometer or by changing the value of the current limiting resistor being used.
WS2811 LEDs (NeoPixel compatible)
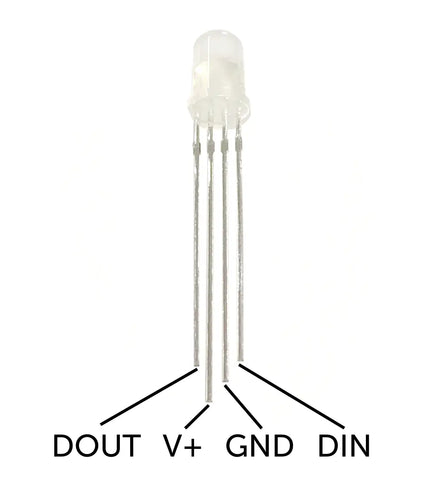
These LEDs are individually addressable WS2811 RGB pixels, each LED has an integrated driver all enclosed in a diffused lens. They're fully compatible with the Adafruit NeoPixel library which makes them simple and easy to control via a single data connection. You'll need to connect them to a controller compatible with NeoPixel LEDs, we've used them with a Raspberry Pi, various Arduino boards and even the BBC micro:bit. You just need to hook up the V+ and GND to power (5V) and ground and then DIN to the data pin defined in your program.