
The BBC micro:bit is a great STEM educational tool for learning all sorts of electronics and coding, supporting a learner's natural progression from block-based programming to textual based ones. We have done a number of tutorials around block programming and JavaScript, in this tutorial we are going to look at creating your first micro:bit program using the Python programming language.
The micro:bit has it's own Python editor which can be found here, the interface is very different from what you might have used for the MakeCode editor as detailed below.
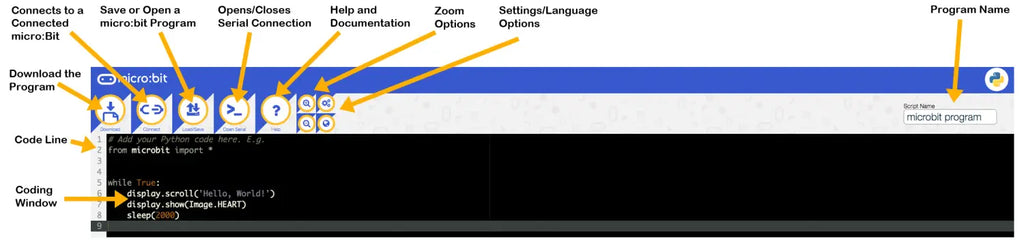
When you open the program you will notice that there is already some code as seen in the image above, this is an example program that when loaded onto your micro:bit will repeatedly display the words "Hello World" and then show the image of a heart.
Step One:
Highlight and delete all of the text on lines 1 to 9 to give yourself a blank workspace

Step Two:
On line one type from microbit import * and press enter.

In order to use all the different features of the micro:bit e.g. gestures or LEDs, we have to import their libraries into our program. There are many different ones that the micro:bit uses, so to both save us time and give us access to all the features we use the * at the end of this import line, this tells the program to import every micro:bit library.
Step Three:
On line two, type import random and press enter.

This line of code imports the library that allows us to use the features to select a random number or item.
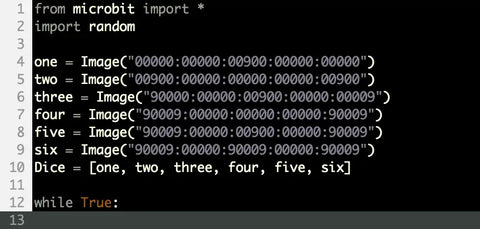
Step Four:
On line three, type one = Image("00000:00000:00900:00000:00000") and press enter.

This creates an object called one and lets the program know that it is an image that needs to be displayed. The image is created by writing 5 lines of 5 numbers separated by :'s these are linked to the positions of the micro:bits LEDs on the micro:bit as seen in the image below.
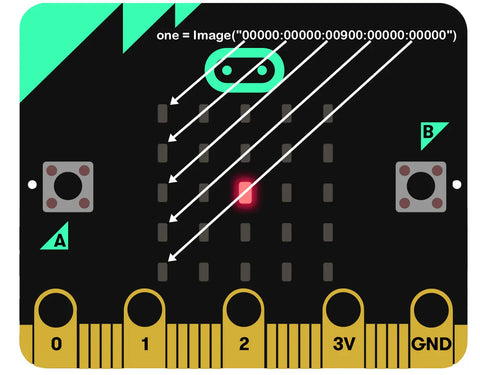
The values 0-9 can be used to select the brightness for the LEDs, 0 is turned off while 9 is the brightest.
Step Five:
On lines five, six, seven, eight and nine type the following lines of code and press enter
two = Image("00900:00000:00000:00000:00900")
three = Image("90000:00000:00900:00000:00009")
four = Image("90009:00000:00000:00000:90009")
five = Image("90009:00000:00900:00000:90009")
six = Image("90009:00000:90009:00000:90009")
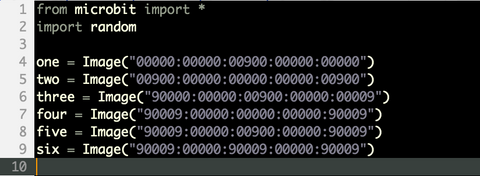
This creates the rest of the images that will be used for the dice.
Step Six:
On line ten, type Dice = [one, two, three, four, five, six] and press enter.
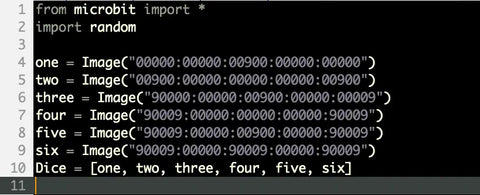
This has created an array that will allow the program to quickly and easily use any of the images that you have just created. The easiest way to think about this would be to imagine it as a list of different items.
Step Seven:
On line twelve type while True: and press enter.
This creates a loop that will keep repeating all of the code underneath it while the micro:bit is turned on.
Step Eight:
On line thirteen, type the following display.show(Image.CHESSBOARD) and press enter, you will notice that it is now indented slightly, this is to indicate that it is part of the loop.
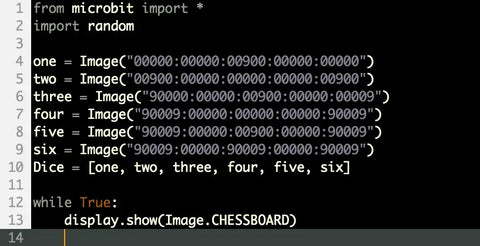
This will show an image using the micro:bits LEDs, the Image.CHESSBOARD part of the code tells the program to look at the image library for the micro:bit that was imported at the start of the program and display the Chessboard image.
Step Nine:
On line fourteen, type if accelerometer.was_gesture("shake"): and press enter

This creates an if statement that will be checking for when the accelerometer on the micro:bit is shaken. When it detects that it has been shaken, it will run the code you will be adding in the next few steps.
Step Ten:
On lines fifteen, sixteen and seventeen, type the code below and press enter
display.show(Dice)
display.clear()
sleep(1000)
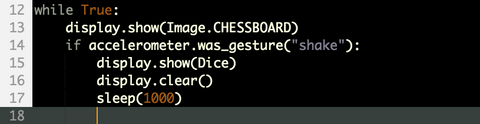
This step makes the micro:bit do three different things, the first thing that it does is display all of the images in the Dice list you created earlier. The second line of this step turns off all of the LEDs, while the third line pauses the program for 1000ms which is 1 second.
Step Eleven:
On lines eighteen and nineteen, type the final lines of code below and press enter
display.show(random.choice(Dice))
sleep(2500)
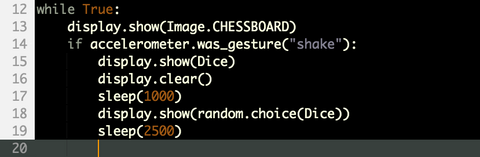
The first line of code in this step picks a random image from the Dice list and displays it to the user, the second line of this step pauses the program for 2500ms or 2.5 seconds giving the user time to read the result.
Uploading the Code:
Now that you have finished the code it is time to upload it onto your micro:bit. This is a really easy process to do using the Python editor.
1) Plug your micro:bit into the computer
2) Click on the Connect button

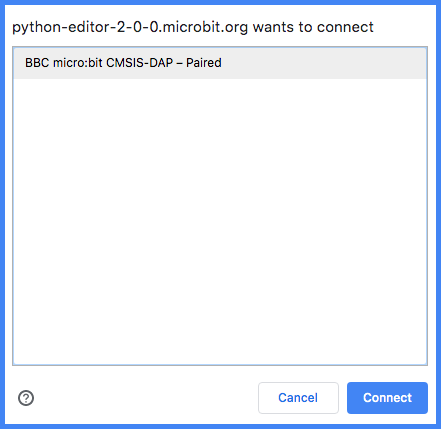
3) In the popup box that appears, select the micro:bit option and click on the connect button.
4) Click on the Flash button to upload the code to your micro:bit