Connecting a camera to a Raspberry Pi opens up a world of new possible uses for the board. Create your own security system, a photo booth, an animal monitoring system or so much more!
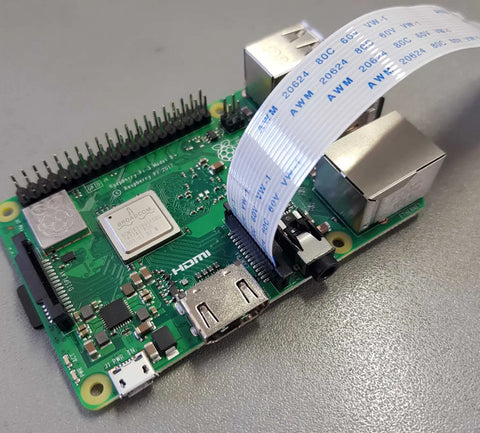
Connect Camera to the Raspberry Pi
Carefully lift/open the connector and place the ribbon cable in the slot. Ensure that the exposed pins are pointing towards the HDMI port. Often there will be a blue indicator on the end of the ribbon cable with should point towards the USB ports.
Ensure the OS Is up to Date
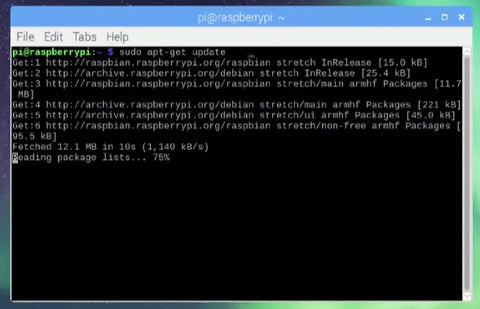
Before using the camera you need to make sure that the operating system on your Raspberry Pi is up to date. This can be done using the commands:
sudo apt-get update
sudo apt-get upgrade
Allow any updates to be downloaded and installed, once finished reboot your Raspberry Pi.
Enable Camera in Raspberry Pi Settings
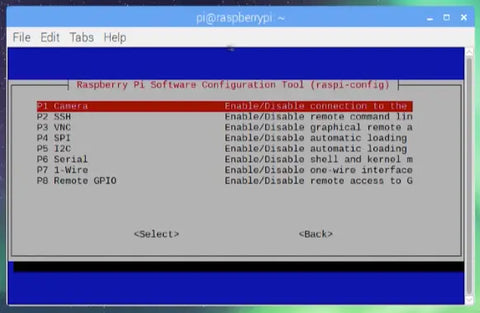
Next, you need to enable to camera interface in the Raspberry Pi board settings. These can be accessed using the command: sudo raspi-config.
Then enable the camera option in the Interfaces section of the menu.
Viewing the Camera Preview
In order to view a preview of the camera, you'll need to create and run a Python file. This can be done by opening the Python IDE from the Programming menu. Once the IDE is open create a new file and enter the following code:
from camera import PiCamera
from time import sleep
camera = PiCamera()
camera.start_preview()
sleep(20)
camera.stop_preview()
Once entered, save and run the case using F5. When the code has been run you'll see a window open for 20 seconds that contains a live video feed from the camera.

Taking a Still Image
The code to take a still image using the camera is very similar to the code used to view the camera preview.
The following code can be added after the sleep in the preview code to take a still image that will be saved to the desktop and named as "image".
camera.capture('home/pi/Desktop/image.jpg')
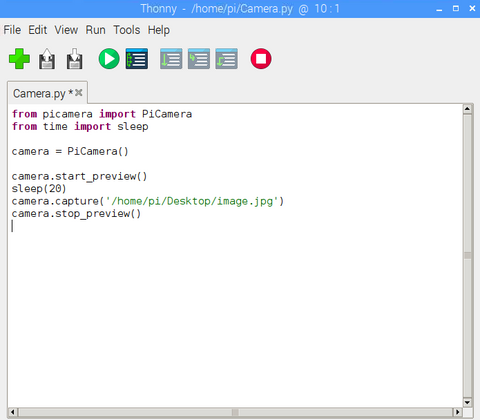
When the code is run you'll see the preview box open and then a picture will be taken. Once the preview window has closed check your desktop for the captured image.
Recording Video
The code used to record videos is almost identical to the code used to take a still image.
The lines of code used to record video are:
camera.start_recording()
camera.stop_recording()