I2C Quad Rotary Encoder Breakout with NeoPixel - STEMMA QT / Qwiic

Adafruit  |  SKU: 4524
£7.99
Tax included, shipping and discounts calculated at checkout.

I2C Quad Rotary Encoder Breakout with NeoPixel - STEMMA QT / Qwiic is backordered and will ship as soon as it is back in stock.


DESCRIPTION

Rotary encoders are soooo much fun! Twist em this way, then twist them that way. Unlike potentiometers, they go all the way around and often have little detents for tactile feedback. But, if you've ever tried to add encoders to your project you know that they're a real challenge to use: timers, interrupts, debouncing...

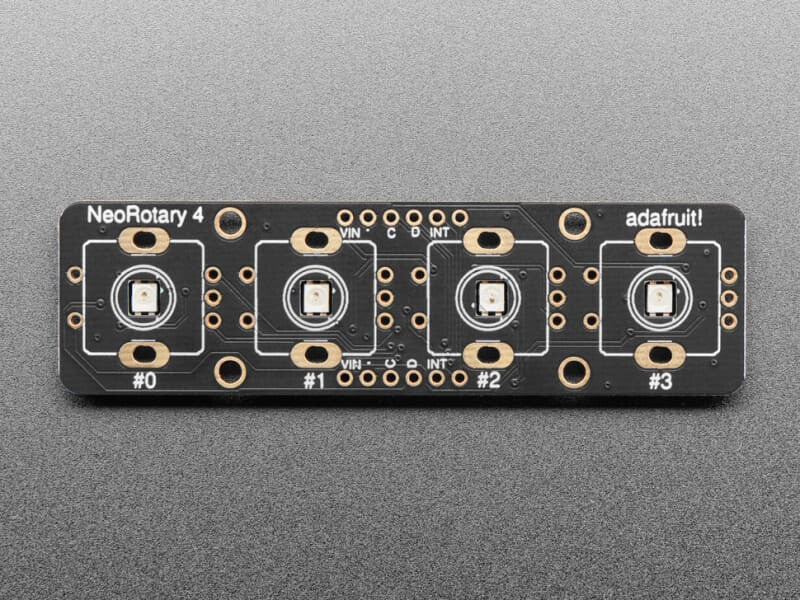
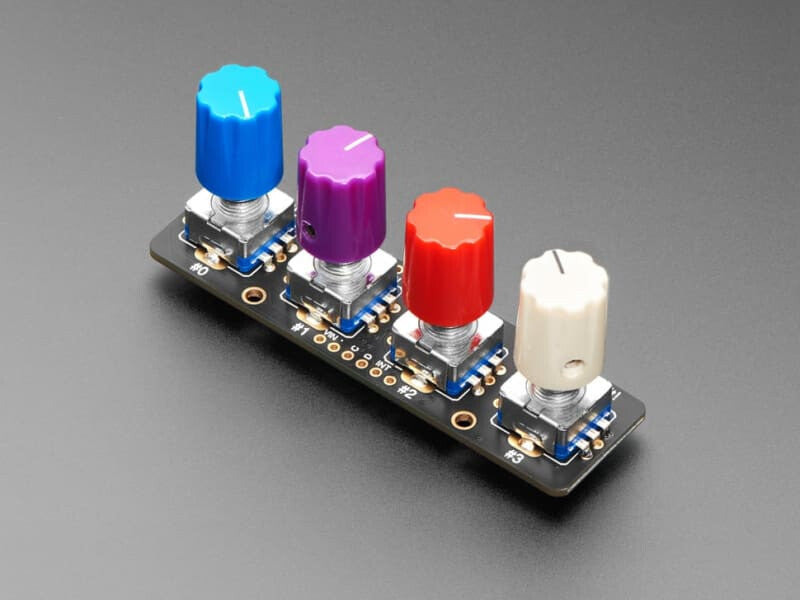
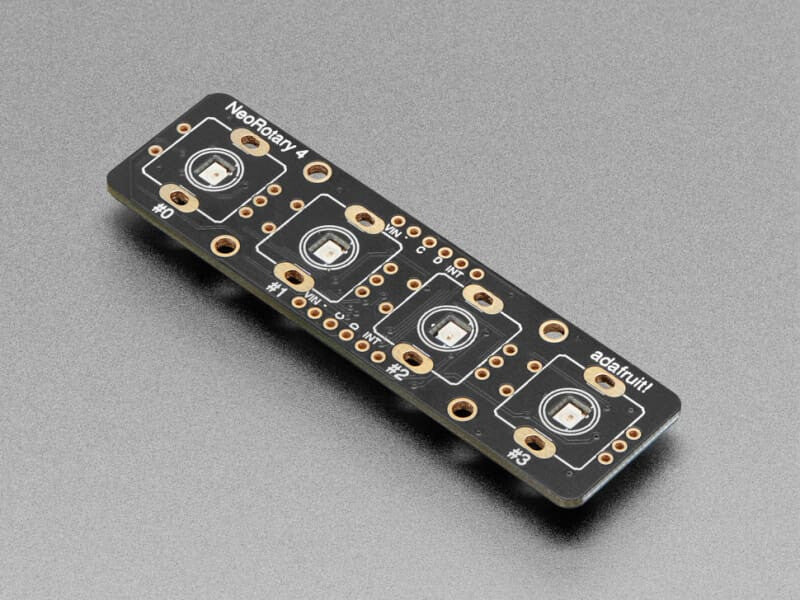
This Stemma QT breakout makes all that frustration go away - and allows you to read up to 4 encoders for big builds with lots of twisty interfaces. You can solder in any four 'standard' PEC11-pinout rotary encoders with or without a push switch. The onboard microcontroller is programmed with our seesaw firmware and will track all pulses and pins for you and then save the incremental value for querying at any time over I2C. Plug it in with a Stemma QT cable for instant rotary goodness, with any kind of microcontroller from an Arduino UNO up to a Raspberry Pi.

You can use the Arduino library to control and read data with any compatible microcontroller. There is also CircuitPython/Python code for use with computers or single-board Linux boards.

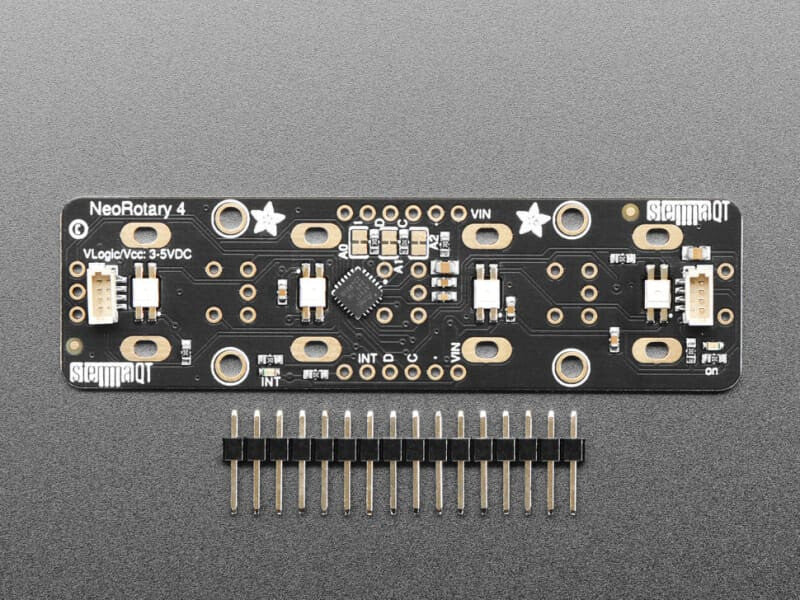
It's also easy to add this breakout to a breadboard - with six 0.1"-spaced breakout pads. Power with 3 to 5V DC and then use 3 or 5V logic I2C data. The INT pin can be configured to pulse low whenever rotation or push-buttoning is detected so you do not have to spam-read the I2C port to detect motion.

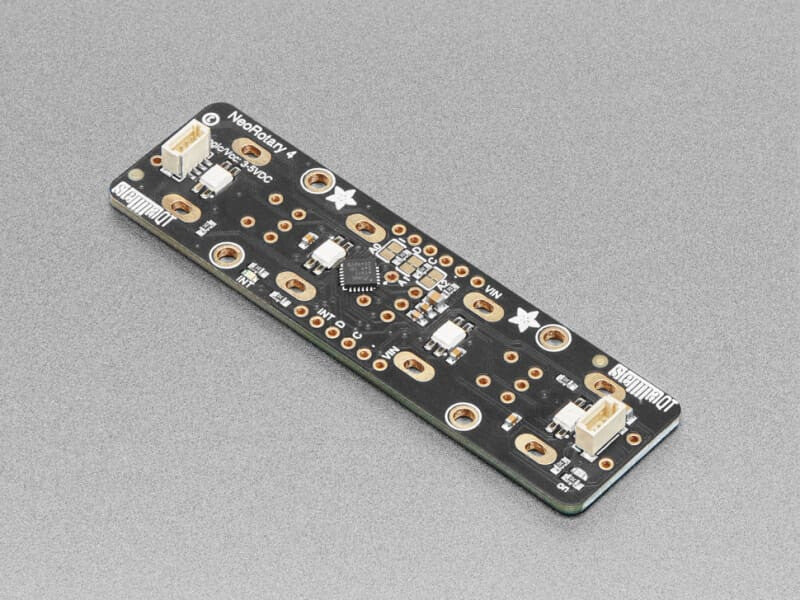
If you happen to be using clear/translucent shaft encoders, there are reverse-mount NeoPixels on board, that can display any colour you like, they are controlled over I2C for additional visual feedback or keep them off if you like. Note that for metal-shaft encoders, the LEDs are not visible. On the back, there's a green power LED as well as a red INT LED that, if the interrupt is configured, will blink when the interrupt fires.

Using the three onboard address jumpers, you can connect up to 8 of these encoders on a single I2C port. The first one will be at address 0x49, the last one at 0x51 when all three jumpers are cut open.

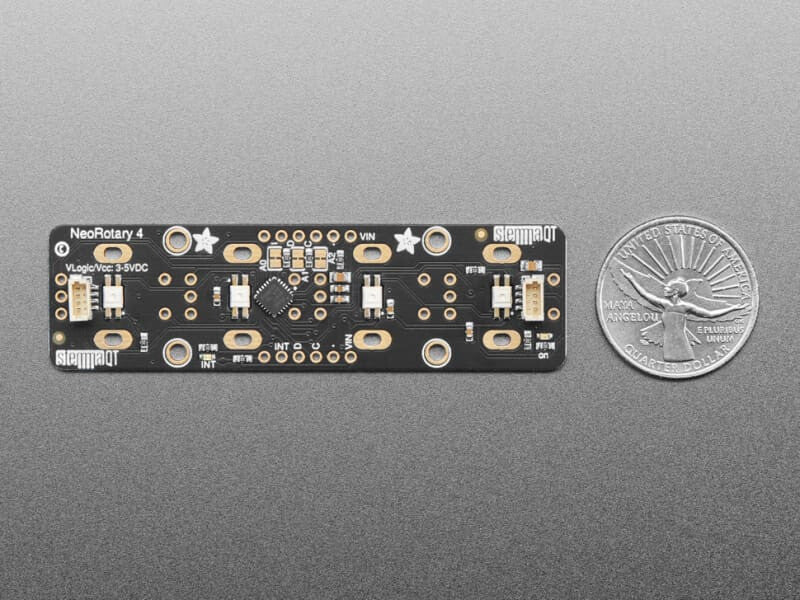
To get you going fast, we spun up a custom-made PCB with the seesaw chip and all supporting circuitry, in the STEMMA QT form factor, making them easy to interface with. The STEMMA QT connectors on either side are compatible with the SparkFun Qwiic I2C connectors. This allows you to make solderless connections between your development board and the rotary encoder or to chain them with a wide range of other sensors and accessories using a compatible cable. QT Cable is not included, but we have a variety in the shop.

This breakout does not come with any encoders soldered on, so you can pick whatever encoder you like. You can also use encoders without detents or with a different number of detents per rotation, of course! You'll need to solder the encoders and optional header onto the PCB to use with a solderless breadboard. but it's fairly easy and takes only a few minutes even for a beginner.

RESOURCES

 Primary Guide: Adafruit I2C Quad Rotary Encoder Breakout

I2C Quad Rotary Encoder Breakout with NeoPixel - STEMMA QT / Qwiic
Adafruit

I2C Quad Rotary Encoder Breakout with NeoPixel - STEMMA QT / Qwiic

£7.99
DESCRIPTION

Rotary encoders are soooo much fun! Twist em this way, then twist them that way. Unlike potentiometers, they go all the way around and often have little detents for tactile feedback. But, if you've ever tried to add encoders to your project you know that they're a real challenge to use: timers, interrupts, debouncing...

This Stemma QT breakout makes all that frustration go away - and allows you to read up to 4 encoders for big builds with lots of twisty interfaces. You can solder in any four 'standard' PEC11-pinout rotary encoders with or without a push switch. The onboard microcontroller is programmed with our seesaw firmware and will track all pulses and pins for you and then save the incremental value for querying at any time over I2C. Plug it in with a Stemma QT cable for instant rotary goodness, with any kind of microcontroller from an Arduino UNO up to a Raspberry Pi.

You can use the Arduino library to control and read data with any compatible microcontroller. There is also CircuitPython/Python code for use with computers or single-board Linux boards.

It's also easy to add this breakout to a breadboard - with six 0.1"-spaced breakout pads. Power with 3 to 5V DC and then use 3 or 5V logic I2C data. The INT pin can be configured to pulse low whenever rotation or push-buttoning is detected so you do not have to spam-read the I2C port to detect motion.

If you happen to be using clear/translucent shaft encoders, there are reverse-mount NeoPixels on board, that can display any colour you like, they are controlled over I2C for additional visual feedback or keep them off if you like. Note that for metal-shaft encoders, the LEDs are not visible. On the back, there's a green power LED as well as a red INT LED that, if the interrupt is configured, will blink when the interrupt fires.

Using the three onboard address jumpers, you can connect up to 8 of these encoders on a single I2C port. The first one will be at address 0x49, the last one at 0x51 when all three jumpers are cut open.

To get you going fast, we spun up a custom-made PCB with the seesaw chip and all supporting circuitry, in the STEMMA QT form factor, making them easy to interface with. The STEMMA QT connectors on either side are compatible with the SparkFun Qwiic I2C connectors. This allows you to make solderless connections between your development board and the rotary encoder or to chain them with a wide range of other sensors and accessories using a compatible cable. QT Cable is not included, but we have a variety in the shop.

This breakout does not come with any encoders soldered on, so you can pick whatever encoder you like. You can also use encoders without detents or with a different number of detents per rotation, of course! You'll need to solder the encoders and optional header onto the PCB to use with a solderless breadboard. but it's fairly easy and takes only a few minutes even for a beginner.
RESOURCES

 Primary Guide: Adafruit I2C Quad Rotary Encoder Breakout

View product