
Charger Kit for micro:bit
Charger Kit for micro:bit is backordered and will ship as soon as it is back in stock.
Couldn't load pickup availability
DESCRIPTION
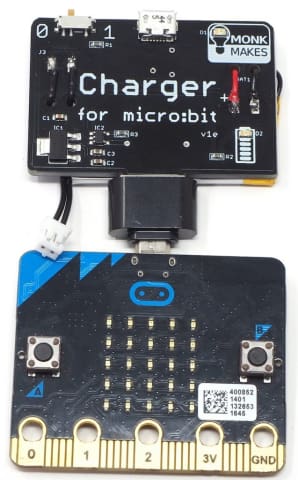
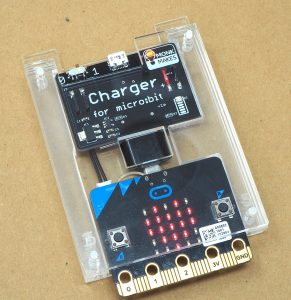
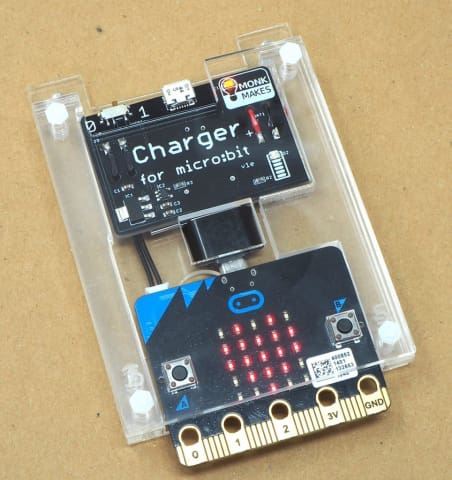
A LiPo battery and charger board that charges automatically while you use your micro:bit! This neat solution to your micro:bit’s power needs comes with an acrylic layer enclosure to protect your micro:bit and the Charger for micro:bit.
Using the Charger
The Charger for micro:bit contains a rechargeable battery, that will automatically charge whenever the device is plugged into a USB power source such as your computer. You can also flash programs onto your micro:bit through this connection. There is no need to take anything apart.
When the charger is fully charged (which should take about 3 hours from empty) a green LED on the charger will light. Note that you don’t have to fully charge the Charger before using it.
If you want to power the micro:bit from the Charger’s battery, then just unplug the USB lead to your computer and slide the switch on the Charger to the right (1-position).
When you have finished using your micro:bit on the battery, then either plug it back into a USB power source to get it charging again or turn the switch to off (0) to save the battery.
A fully charged Charger for micro:bit will power the micro:bit on its own for about 24 hours.
RESOURCES
Assembly Instructions
Step 1. Check the Contents
Take the parts out of the box (contained in three bags) and check that you have everything.
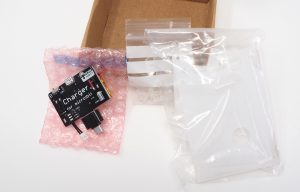
You should have the following items:
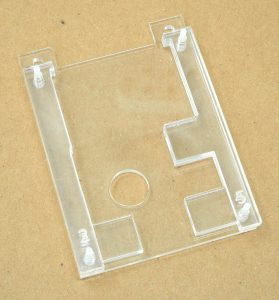
- Acrylic pieces labelled 1 to 6
- Charger for micro:bit board with USB adapter fitted
- 4 x plastic nuts and bolts
Step 2. Put the Bolts Through the Base
Push the bolts through the back of the piece labelled 1. It's difficult to do this without bolts falling out as fast as you put them in. If you do it near the edge of your table, you can slide one corner of piece 1 over the edge of the desk at a time and push its bolt through.
Make sure that the piece is the right way around, with the engraved number 1 in the bottom left.
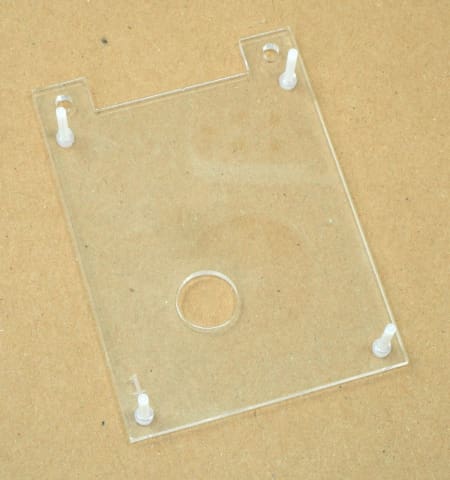
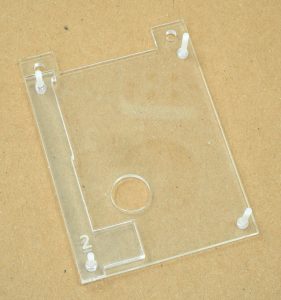
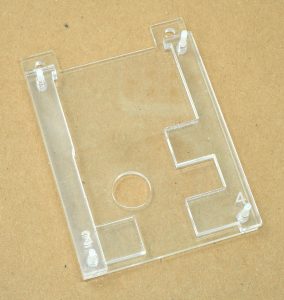
Step 3. Assemble the Layers
Place the acrylic pieces over the bolts as shown in the sequence below. You can tell that it is the right way around from the photo, and also by checking that the numbers engraved on the plastic are the correct way up.
 |
 |
 |
 |
Step 4. Connect USB
Connect your BBC micro:bit to the Charger for micro:bit’s USB plug.
If the USB plug won’t fit into the micro:bit’s USB socket make sure that the black USB adaptor hasn’t been put onto the Charger for micro:bit the wrong way around.
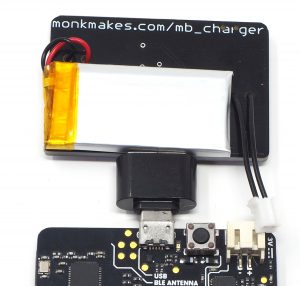
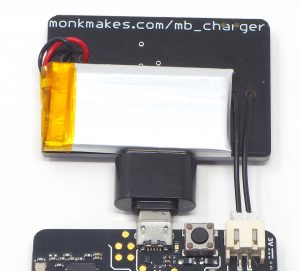
Step 5. Connect the JST Battery Connector
Flip the micro:bit and Charger over and plug the JST plug coming from the lead on the Charger for micro:bit into the JST ‘battery’ socket on the micro:bit. This will only connect one way around.
 |
 |
Step 6. Fit the micro:bit and Charger into Position
Place the connected micro:bit and Charger for micro:bit onto the acrylic assembly as shown below.

Step 7. Put on the Top Layer of Acrylic
Put the acrylic layer labelled 6 into place, with the square cut-outs over buttons A and B
Step 8. Fit the Nuts
Place the nuts over the top of the screws and tighten them (finger tight).
You can use a small screwdriver to hold the screws still while you tighten the nuts with your fingers.

Charger Kit for micro:bit
