ServoSix (Board Only)
ServoSix (Board Only) is backordered and will ship as soon as it is back in stock.
Couldn't load pickup availability
DESCRIPTION
Help yourself by making your life easier with the Servo Six board, designed to simplify the process of connecting up to six servo motors to your favourite Raspberry Pi or Arduino.
Please Note:
- Raspberry Pi, Arduino and Servos are not included.
FEATURES
- Screw terminals for servo power supply
- Reverse-polarity protection for the servo power supply
- 470µF 16V capacitor for servo supply
- 470Ω current limiting resistors for servo control lines (to protect GPIO pins)
- Power indicator LED
RESOURCES
Connecting a Servo Six board to a Raspberry Pi
To connect a ServoSix board to a Raspberry Pi you need a female to female jumper wire to connect ground (GND) on the Raspberry Pi to GND on the ServoSix board. For each servo (up to six) that you want to control, you also need a female to female jumper wire connecting the control pin for that servo on the ServoSix board to one of the GPIO pins on the Raspberry Pi.
As a hint, the ServoSix board has the GPIO pin to be used with a particular control pin written next to it.

So, looking at the picture above, the left-most pin is GND and should be connected to a GND pin on the Raspberry Pi. The next pin along (control pin 1) should be connected to GPIO17 on the Raspberry Pi, control pin 2 on the ServoSix to GPIO18 and so on.
Power for the motors must be supplied separately using the screw terminal on the right.
Software (Raspberry Pi)
The easiest way to control servos from Python is to use the official Raspberry GPIO zero library, this provides a handy class called AngularServo.
Here’s an example that should get you started. Connect a servo to channel 1 as shown above.

When you run the program, a window will open with a slider. Move the slider left and right and the servo should follow.

Software (Arduino)
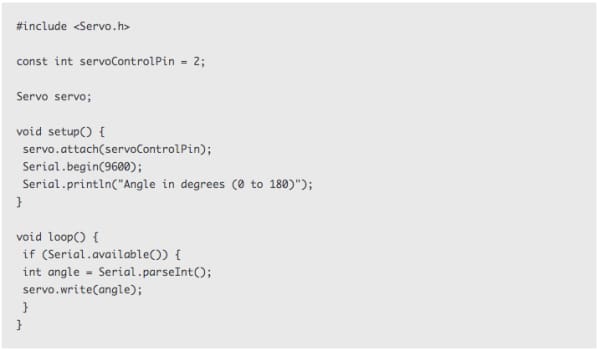
When using the Servo Six with an Arduino, you can just use the standard Arduino Servo library.
The following sketch assumes that a servo is attached to channel 1 and that channel 1 is linked to pin 2 of the Arduino. Use the serial monitor to enter an angle between 0 and 180 degrees.


