Translation missing: en.general.accessibility.skip_to_content
Using an RFID Reader with an Arduino

Using an RFID Reader with an Arduino

The use of RFID technology is fascinating and becoming even more commonplace in our lives. It's used in a variety of security systems, inventory tracking, running race timing and even interactive displays and marketing. We'll be taking a look at how to use an RFID reading with an Arduino and some of the basic code used.
Parts & Components
In this blog post, we'll be using the ID-12LA RFID reader which can read signals at the frequency of 125kHz. We'll also be using the Qwiic RFID reader and a SparkFun RedBoard to make setting up the system as hassle-free as possible! Don't worry though we'll still explain how to connect the reader up to a standard Arduino.


Wiring

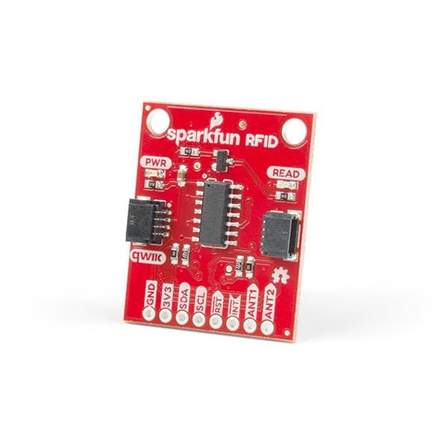
With the Qwiic RFID board connecting the reader is as simple as slotting it into the board's header pins. If you're not using the Qwiic board then we'd strongly recommend using this breakout board as it makes wiring the reader much much easier.

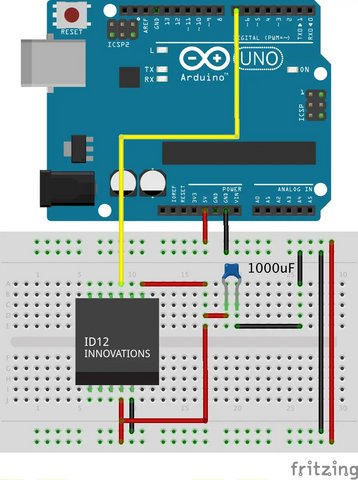
RFID readers often have different types of operation, these are usually detailed in the datasheet for the item. As we want the reader to output ASCII characters we'll be wiring it as the diagram below shows.


The Code

We'll be using the Read Tags example from the SparkFun library provided for the Qwiic RFID reader. It will read and store the the ID and time information about each tag scanned.


#include "SparkFun_Qwiic_Rfid.h"

#define RFID_ADDR 0x7D //Default I2C Address

Qwiic_Rfid myRFID(RFID_ADDR)

String tag;

float scanTime;

int serialInput;

void setup( )

{
//Begin I2C
Wire.begin();
Serial.begin(115200);
if(myRfid.begin())
Serial.println("Ready to scan some tags!");
else
Serial.println("Could not communicate with Qwiic RFID!");

}

void loop( )

{
if (Serial.available()>0){

serialInput = Serial.read();
if(serialInput == 49){

tag = myRfid.getTag():
Serial.print("Tag ID: ");
Serial.print(tag);
Serial.print(" : ");
scanTime = myRfid.getPrecReqTime();
Serial.print(" Scan Time: ");
Serial.print(scanTime);
}
}
}


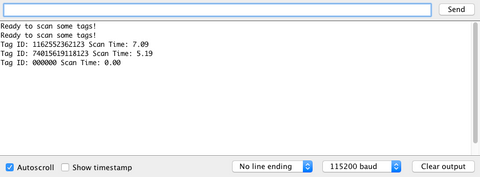
When the Arduino is programmed and the Serial Monitor is opened we're ready to scan some tags! When "1" is entered into the serial monitor it will output details of the tags scanned. 


This code can be expanded on to do things such as RFID tag entry access or object recognition and so so much more! 

Previous article Comparing the BBC Micro:Bit V1 and V2, what is different?