We have done a number of tutorials for the HaloCode before using their blocky software, including a Sound Equalizer and a Four Player Game. This week we will be introducing you to creating some simple LED effects on the HaloCode using the Python programming language.
Plugging In
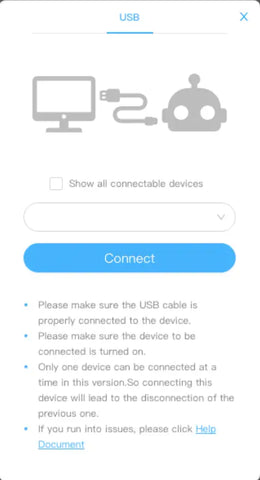
The HaloCode can connect to your PC or Mac via a USB A to micro B cable. Plug USB A end into your devices USB Port and plug the micro B end into the micro-USB port on the bottom of the HaloCode. Plug USB A end into your devices USB Port and plug the micro B end into the micro-USB port on the bottom of the HaloCode.
Software
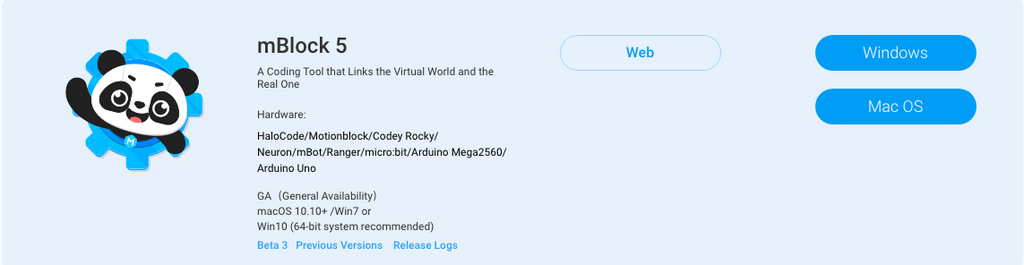
The mBlock software for the HaloCode comes in two different versions, the online version can be used within any internet browser (Chrome is recommended) and an offline version which is available for download on PC and Mac OS.
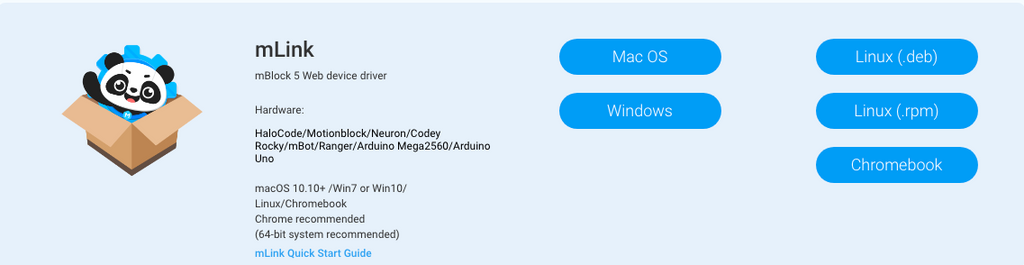
If you are using the online version you will also need to install the browser plug-in in order for the software to communicate with the HaloCode.
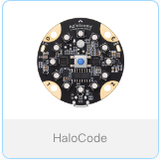
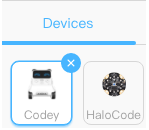
When you first load the software, the device setup for coding will default to the Codey Rocky. Follow the four steps below in order to change the device to the HaloCode.
- In the Devices tab, click on the blue plus symbol in the white box next to the Cody.
- In the new window that opens, double click on the HaloCode icon.
- When it has finished loading, click on the Codey again in the Devices tab. With Codey selected click on the white x in the blue circle
- You should be left with just the HaloCode in the Devices tab.

|
 |
 |
 |
| 1 | 2 | 3 | 4 |
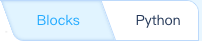
Within the coding software, you can quickly switch between using Block programming and Python by clicking on the button in the top right of the screen.
 |
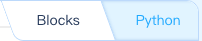 |
| Block Programming Mode | Python Mode |
For this tutorial, make sure you are in Python Mode.
Coding
Step One)
The first thing that you need to do is give the Python program access to code from other modules, which is done using the import command. On line one, copy or type the following line of code:
import event, haloStep Two)
Next, you are going to create an event for when the HaloCode first turns on. This will create a rainbow effect across the LEDs for one second and start a loop which will display LEDs based on the level of sound the microphone picks up. On lines 3-8, copy or type the following line of code:
@event.start def on_start(): halo.led.show_ring('orange yellow green cyan blue purple blue cyan green yellow orange red') time.sleep(1) while True: halo.led.ring_graph(halo.microphone.get_loudness("maximum")) Step Three)
Now are going to create an event for when the button on the HaloCode is pressed. This will light up all the LEDs red for one second before turning them off. On lines 10-14, copy or type the following line of code:
@event.button_presseddef on_button_pressed(): halo.led.show_all(208, 2, 27) time.sleep(1) halo.led.off_all() Step Four)
So far you've coded the onstart and button events, now you will code the touchpads, these next few steps will be pretty similar with a few changes to the LEDs lit and colours. This first step will light LEDs 9,10,11 and 12 when touchpad 0 is pressed. On lines 16-23, copy or type the following line of code:
@event.touchpad0_active def on_0_active(): halo.led.show_single(9, 255, 0, 0) halo.led.show_single(10, 255, 0, 0) halo.led.show_single(11, 255, 0, 0) halo.led.show_single(12, 255, 0, 0) time.sleep(1) halo.led.off_all() Step Five)
This next step is going to be very similar to the previous one but instead will light LEDs 6,7,8 and 9 when touchpad 1 is pressed. On lines 15-32, copy or type the following line of code:
@event.touchpad1_active def on_1_active1(): halo.led.show_single(6, 0, 255, 0) halo.led.show_single(7, 0, 255, 0) halo.led.show_single(8, 0, 255, 0) halo.led.show_single(9, 0, 255, 0) time.sleep(1) halo.led.off_all() Step Six)
Again, this step is going to be very similar to the previous one but instead will light LEDs 3,4,5 and 6 when touchpad 2 is pressed. On lines 34-41, copy or type the following line of code:
@event.touchpad2_active def on_2_active2(): halo.led.show_single(3, 0, 0, 255) halo.led.show_single(4, 0, 0, 255) halo.led.show_single(5, 0, 0, 255) halo.led.show_single(6, 0, 0, 255) time.sleep(1) halo.led.off_all() Step Seven)
Lastly, this final step is going to be like the previous ones but will light LEDs 12,1,2 and 3 when touchpad 3 is pressed. On lines 43-50, copy or type the following line of code:
@event.touchpad3_active def on_3_active3(): halo.led.show_single(12, 255, 0, 0) halo.led.show_single(1, 0, 255, 0) halo.led.show_single(2, 0, 0, 255) halo.led.show_single(3, 255, 0, 0) time.sleep(1) halo.led.off_all() Uploading Code to HaloCode
Click the blue Connect button at the bottom of the screen, in the popup box that opens, press the Connect button. Once connected, click on the upload button at the bottom of the screen.